
This post contains links that, if you click on them and make a purchase, will earn me money. As an Amazon Associate, I earn from qualifying purchases. . Regardless, I only recommend products or services that I believe will be good for my readers. Thanks for helping me continue to produce great content!
This is the fourth and last post in a series of posts I’ve written on how to make homemade sourdough bread, in which I will share with you the sourdough bread recipe that I’ve found that works the best for me.

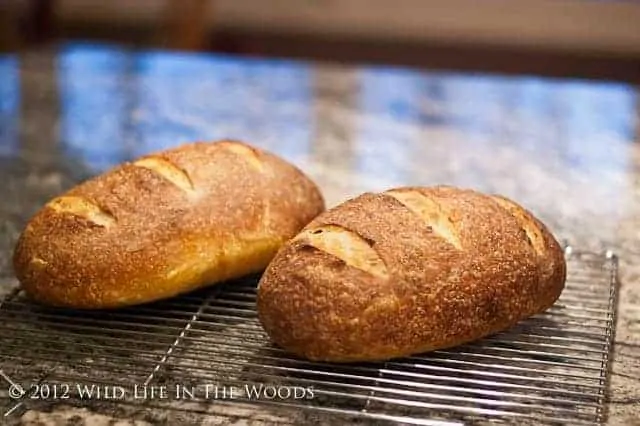
Here’s the Proof. Yes, you CAN make beautiful homemade sourdough bread.
Part 1:
In Part 1 of the series, I shared with you some deflating truths that I’ve learned through this five month learning process. I don’t share these truths with you to scare you off – far from it! I share this information just to make sure you are duly warned. These are the things that I didn’t know before I started that I wish someone had shared with me.
Part 2:
In Part 2, I talk about the scientific reasons as to why you really MUSN’T cut corners on the quality of your ingredients, (even though I may have tried to myself, initially 😀 ) and I share with you the specific ingredients and tools you’ll need to bake your own beautifully delicious sourdough bread.
Part 3:
In Part 3, I explain the somewhat lengthy process of being sure that your starter is happy, healthy, and fully refreshed. (Yes, I’ve tried shortcuts in that area, too, but sadly, you really bake a better loaf of bread if you actually follow the directions. Who knew? 😀 )
Part 4: The Recipe
So, today, in my last and final post in this series, I’ll share with you the recipe that has worked most consistently and best for me. And to those of you who love Cook’s Illustrated, you won’t be surprised to learn that I follow their process. I tried the King Arthur recipe and process, but the bread produced by that recipe was tame and boring, when compared with the lovely sourdough tang and improved texture that came from following the procedure outlined by Cook’s Illustrated.
Notes Regarding my Sourdough Bread Recipe
I prepared my loaves of bread using a Kitchen Aid mixer, using their dough hook attachment. If you want to use this recipe and knead by hand, it will work just fine, but you’ll need to double the amount of time you spend actually kneading.
I’m going to tell you this next fact because I have some bread making friends who LOVE to grind their own whole wheat flour to use in baking bread. I understand their passion. I’ve shared it myself. Friends, I’ve made this recipe substituting my own freshly ground whole wheat flour for some of the all-purpose flour.
In comparison, the bread made with whole wheat flour was not nearly as satisfying.
It didn’t rise as high, was much heavier in texture, and overall, my family and I were disappointed in the outcome. I know you’ll probably want to try this out for yourself, if you’re passionate about grinding your own flour, and maybe you’ll have a better outcome than I did. But I’m going to tell you that given my experience, I won’t be repeating that experiment.
REMINDERS IN REGARD TO EQUIPMENT AND INGREDIENTS:
- Use filtered water.
- I recommend unbleached, artisan, all-purpose flour with a protein level of between 11-13%. (King Arthur, really DOES make a difference. I’ve tested, I’ve tasted, and I’ve seen.)
- I always measure my flour and my starter by weight, on a scale. It’s much more accurate.
- Once my dough is made, it rests on parchment paper for the remainder of the process. It acts as a sling. You’ll be glad you have it.
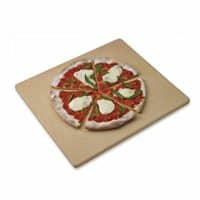
- I also use a big round pizza stone in my oven, on which I bake the bread, to help develop “oven spring” and the kind of crust I want.
- I use a big spray bottle to spray water onto my loaves, to help them develop that beautiful “blistered” look to the crust.
If you don’t understand why I strongly encourage the use of each of these items, read my second post, Part 2, about the ingredients.
TIME CONSIDERATIONS:
It’s not a difficult process, but it’s a time consuming process.
EVEN WITH A FULLY REFRESHED STARTER (and refreshing your starter takes a couple of days), making a great loaf of sourdough is still a TWO DAY PROCESS. The sourdough needs the long, slow fermentation it gets from spending the night chillin’ in your fridge, to develop that great sourdough tang. So…how does this work out, practically speaking, in terms of time? (Think Algebra word problem, here.)
Let’s say you want fresh bread for a lovely Italian meal you’re planning for dinner on Wednesday night.
You’ll need to start making that bread on Tuesday morning. Each step of the actual bread making process is very easy. But time must be allotted for allowing gluten strands to form through kneading, and then allowing those gluten strands to relax through those the specified resting times.
The Basic Outline of the Sourdough Bread Recipe:
Here’s the basic outline, with some time constraints, to help you get a ballpark picture of what this process looks like when broken down, time-wise:
- MAKE THE SPONGE: then let it rise for 2-3 hours
- MAKE THE DOUGH: then let it rest 20 minutes
- KNEAD THE DOUGH: by machine, this takes about 5 minutes
- LET THE DOUGH RISE: this takes 3-5 hours
- STRETCH AND FOLD THE DOUGH
- DIVIDE AND SHAPE THE LOAVES: then let them rest for 15 minutes
- REFRIGERATE THE LOAVES OVERNIGHT: 8-12 hours
- PROOF THE LOAVES: allow the dough to rise once it comes out of the fridge takes 2-4 hours
- SLASH AND SPRAY THE LOAVES
- BAKE THE BREAD: 30 minutes
- COOL THE BREAD: Ideally, the bread needs to cool for 2 hours. (In practice: this is hard to do!!!)
In case you are wondering about that first step, the one called “making a sponge”? A sponge (also called a levain in some bread recipes), is just a beefed up starter, made by mixing a portion of your fully refreshed starter with some filtered water and flour. So…just to review…you use a portion of your fully refreshed starter to make a sponge, and once it’s fully developed, the sponge is then used to make bread dough.
Refreshed Starter ——>Sponge——>Bread dough.
Get it?
(Once you’ve removed that half cup of fully refreshed starter from the starter you’ve been nurturing, you can store the remainder of the unused refreshed starter back in the fridge, and pull it out again next time you’re ready to feed it: within a week is best.)
.jpg) |
| PROOF THE LOAF: Here, we see the loaf on the parchment paper, on the jelly roll pan, following its all-night nap in the refrigerator. I’m now going to allow it to rise for a while. |
.jpg) |
| SLASH THE LOAF: after its final rise/being proofed, right before I put it in the oven. |
Sourdough Bread Recipe
How to Make Sourdough Bread
It really is possible to make delicious, artisan sourdough bread AT HOME. It's not without quite a bit of effort, but you'll find your result deeply rewarding.
Ingredients
- SPONGE:
- 4 1/2 oz. refreshed starter (1/2 cup)
- 3-4 oz. filtered water, at 80º (use about 3 oz. if it's humid, 4 oz. if your environment is low in humidity)
- 5 oz. unbleached, all-purpose flour (1 cup) with a protein level of between 11-13%
- DOUGH:
- 12 oz. filtered water, (1 and 1/2 cups) at 70º
- 24 oz. unbleached all-purpose flour (about 4 3/4 cups) with a protein level of between 11-13%
- 2 1/2 teaspoons of table salt
Instructions
- MAKE THE SPONGE: With a half of a cup of bubbly, fully refreshed starter (that was last refreshed no more than 12 hours earlier), you're going to make the "sponge". In a bowl, with at least a 1 quart capacity, stir together the 1/2 c. (4 1/2 ounces) of starter with 1/2 c. filtered water, until fully combined. Then stir in 1 c. (5 oz.) flour. The mixture will be like super-thick, lumpy pancake batter. Lumps are OK, in other words. Cover bowl with plastic, and let rise at room temperature for 2-3 hours.
- MAKE THE DOUGH: Add water and sponge to the bowl of a standing mixer. Using a dough hook, with mixer running at lowest speed, add the flour, 1/2 of a cup at a time. Once all flour has been added in, continue to mix until dough forms a ball, and then let the mixer run one minute longer. Cover bowl with plastic wrap, and allow dough to rest for 20 minutes.
- KNEAD THE DOUGH: Using your fingers, make a little pocket in the dough and add the salt to that pocket. Knead dough on low speed until it is smooth, soft, and moist, about 5 minutes. You are going to love the way the dough feels: just like a baby's behind! Transfer dough to clean work surface and knead for a minute by hand, until dough forms a firm ball.
- LET THE DOUGH RISE: Spray a 4qt. capacity bowl with non-stick cooking spray and place dough in bowl. Then spray top of dough with cooking spray as well, and cover the bowl with plastic wrap. Let stand until dough doubles in size, 3-5 hours.
- STRETCH AND FOLD THE DOUGH: Scrape dough out onto clean work surface. Gently stretch dough to redistribute and refresh yeast, as far as you can, without tearing it, and then fold dough into thirds, like a letter.
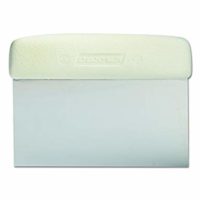
- DIVIDE AND SHAPE THE LOAVES: Using a bench scraper or a knife, divide dough in half. Each piece should weigh about 1 1/2 lbs. Form each half into a ball or an oval, depending on the shape of the loaf you want, and cover with plastic wrap, allowing the dough to relax for 15 minutes. Continue to form the shape you want, and place each loaf seam side down on a separate sheet of parchment paper. I place them each on top of an upside down jelly roll pan, spray each loaf with cooking spray, and cover with plastic wrap.
- REFRIGERATE THE LOAVES OVERNIGHT: Place the cookie sheet with the loaves on parchment paper, covered in plastic wrap, in the refrigerator overnight, between 8-12 hours.
- PROOF THE LOAVES: Remove the loaves from the refrigerator and from off the jelly roll pan, and place on the kitchen counter. Loosen plastic wrap slightly and let rise until doubled in size, for 3-4 hours, being sure that loaves are at least 6" apart. After 3 hours, adjust oven rack to lower-middle position, and place pizza stone/baking stone on rack. Preheat oven to 500º. Slide loaves one at a time onto upside down jelly roll pan. (You can use a baker's peel for this if you have one, but I don't.) Using a knife tip held at a 45º angle, slash surface of loaves, two or three times, about 1/2" deep. Working quickly, spray the surface of the loaves with water.
- BAKE THE BREAD: Slide the parchment paper and the loaves of bread onto the baking stone. Immediately close the oven door, and lower the oven temperature to 450º. Set the timer for two minutes. Quickly open the oven door when the timer goes off, and spray the loaves with water, being careful not to spray the oven light, which could shatter. Close the oven door, and set the timer for two more minutes. Open the oven door and spray the loaves one last time, closing the door quickly. Set the timer for 25 minutes. Bake until deep golden brown. (If you want to be sure your bread is done, you are looking for an internal temperature of 210º with an instant read thermometer, but I have found that the exterior color of the crust is a good guide.) Bread will need an approximate 30 minutes total in most ovens, but keep an eye on things, since your mileage may vary, depending on your oven. Remove bread (and parchment paper) from oven, and transfer the loaves without the parchment paper to a cooling rack. Bread takes around 2 hours to cool, at which point you can cut it more easily, without squishing it or tearing it. Good luck waiting that long.
Recommended Products
As an Amazon Associate and member of other affiliate programs, I earn from qualifying purchases.


.jpg) Slicing your own homemade sourdough is almost as rewarding as eating it. |
| Might as well throw in a pot of soup, as long as you’re making bread. |


How to Make Homemade Sourdough Bread – just the right size to pin on Pinterest. Here’s the recipe you’ve been waiting for: the recipe for Sourdough Bread,
Please, if you enjoyed this post, or this series of posts, let me know in the comments.
Share it on Facebook or Twitter while you’re at it.
Pin it on Pinterest to remind yourself that this is something you’re ready to try. Here’s the perfect image to pin!


A slightly smaller pin for Pinterest, if you prefer.
Steve
Friday 11th of December 2020
Susan, I started baking sourdough bread about 1 year ago. I must tell you that your directions and recipe for sourdough bread are by far the best instructions I have used. The details you included were concise and easy to follow. The bread I baked came out perfect. Looking forward to using more of your recipes.
Kevin Bryant
Saturday 25th of July 2020
Susan, I'm using a KitchenAid stand mixer for the first time (borrowed it to try your well-written recipe). I have no experience using this machine and have not yet had success with any other sourdough recipe, so I'm not sure what things SHOULD look like at each stage. Could you maybe add pictures? And most importantly for me, in mixing the dough in step 2, about how long should the dough hook be spinning in that mixing bowl, and what should the dough look like when it's 'done' for this stage? The instructions say 'until it forms a ball'. I ran the mixer for 10 minutes and really didn't see what I'd call a ball, but was worried that I would overdo it if I carried on. The dough was still wrapping up dough hook. I'm using the KitchenAid where you can lower the bowl, and when I did that the dough started to look more like a ball, and much of the dough on the hook crawled down. Is that the right idea? Any other guidance for me?
Susan Williams
Monday 27th of July 2020
Dear Kevin,
That's a great idea for the next time I update this post, to add pictures at each stage. I have no plans for doing that in the near future. What a kind neighbor or friend you have, to loan you their Kitchen Aid! I don't think I could make it without mine.
By "forming a ball", I mean that when you start out, you'll see that the dough looks very different. It's kind of everywhere in the bottom of the bowl. After kneading it, using the bread hook for about 10 minutes, you'll see precisely what you have described: the dough will begin to gather around the dough hook, becoming more elastic-y, and will have begun to lift away from the side of the bowl, toward the center. What you described sounds correct.
Hope that helps.
Barry Dunwoody
Monday 22nd of June 2020
Forgot to say protein content of the lo-fodmap flour is 15% and that of the spelt flour is 9%. So my 50/50 mix shpuld be 12% which is in the range you recommend. Is my thinking on this correct? By the way my second batch has just come out of the oven and looks even better than the first!
Barry Dunwoody
Monday 22nd of June 2020
Hello Susan, I am in Australia. Thank you so much for answering a lot of questions about sourdough. I succesfully baked my first two loaves last week following your method and the next two are in the fridge ready for baking tomorrow. My starter came from a friend of my son and has been going for 14 years. Over 3 weeks I fed it it with a 50/50 mix of spelt flour and lo-fodmap flour. My wife is slightly gluten intolerant and she is able to tolerate this mix in the bread. It needed about 2 fl. oz. more water in the dough mix in the KitchenAid mixer but other than that followed your method.
Susan Williams
Monday 22nd of June 2020
So interesting! Thanks, Barry, for letting me know!
Dirk Agueros
Wednesday 10th of June 2020
Susan, I was wondering how long it should take to incorporate the flour into the sponge. As I add each 1/2 cup about how long until the next 1/2 cup? I'm using a Kitchen Aid mixer on the lowest speed. Thank you!
Susan Williams
Saturday 13th of June 2020
I don't wait long between each addition. I just look to see that most of the white has been incorporated into the dough in the bowl, and then add more. Hope that helps.