This post contains links that, if you click on them and make a purchase, will earn me money. As an Amazon Associate, I earn from qualifying purchases. . Regardless, I only recommend products or services that I believe will be good for my readers. Thanks for helping me continue to produce great content!
This recipe for Caramelized Upside-Down Pear Tart is as delicious as it is gorgeous to look at! It’s a bit of a show-stopper, and the perfect dessert following a lovely fall meal.
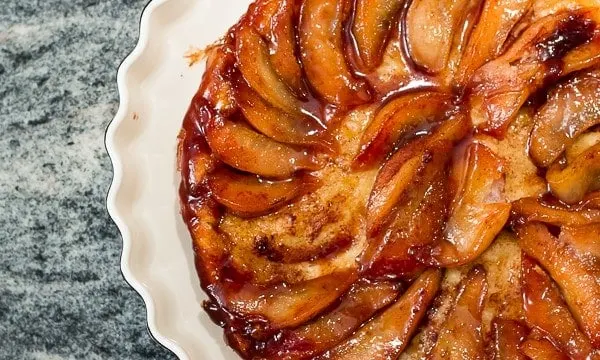
Caramelized Upside-Down Pear Tart, made in a cast iron skillet, is a delicious dessert: for Thanksgiving, or any day!
I first made this recipe about three years ago for Thanksgiving. Then, I forgot about it. Then, I saw pears on sale last week at Publix grocery store. The recipe is even yummier than I remembered. There are a couple of things that make it unique.
Caramelized Pear Tart Made in A Cast Iron Skillet
First, it’s made in a cast iron skillet. Obviously, most pies and tarts are made in pie plates, or pie dishes. (Whatever you call them.)
Caramelized Pear Tart is Unique in Form and Flavor
Second, it’s somewhere between a pineapple upside down cake, and a tarte Tatin, which is kind of the French version of an apple pie. This Caramelized Pear Tart has a lovely, buttery crust, that is different from the normal pie crust that I make for a peach pie or an apple pie.
Easy Steps That Require a Bit of Time To Plan For:
There are a couple of steps that you’ll need to plan for in your prep time. They’re not difficult, but you do need to allow for the appropriate amount of time.
Perfect for Pinning on Pinterest
Allot extra time for chilling the dough:
You will need to chill the crust for at least an hour. (This is not an unusual step. I chill all my pie pastry doughs before I begin working with them.) You can certainly make the pastry dough the day before, and let it chill all night, so that you won’t have to spend as much time making it the day you plan to serve it.
Allot Time for the Caramelized Pears to Cool:
After you have caramelized the pears in the sugar, you need to allow time for the pears to cool in the skillet before you place the crust on top. This takes a couple of hours, so be sure to allow for that.
Both the recipe for the crust, and the tart came from my yellow copy of The Gourmet Cookbook
which was published in 2004, by the Houghton Mifflin Company.
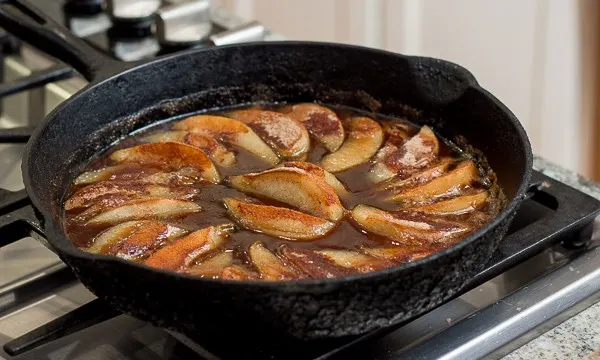
Here, the pears are cooling off in the skillet, waiting for me to lay the pastry dough over them.
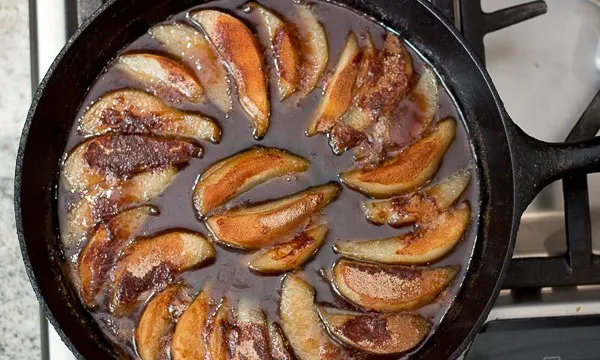
Trying to give you a view of the color of my caramel. The dark brown stuff is the cinnamon.
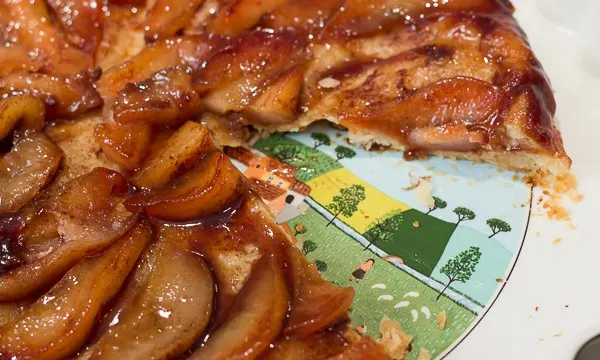
That’s my tart pan given to me by my friend Donna, 29 years ago. Still makes me smile.
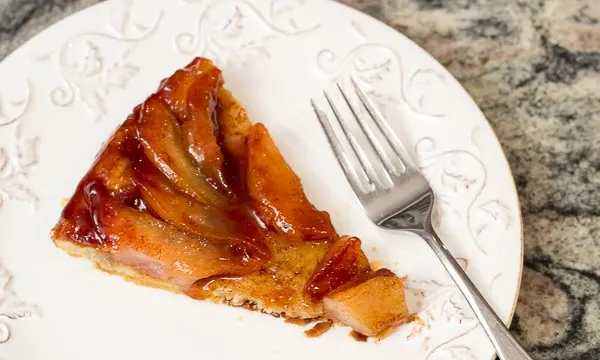
How about a slice?
Caramelized Upside-Down Pear Tart

This recipe for Caramelized Upside-Down Pear Tart is as delicious as it is gorgeous to look at! It's a bit of a show-stopper, and the perfect dessert following a lovely fall meal.
Ingredients
- For Pastry Dough
- . 3/4 stick (6 tablespoons) cold unsalted butter
- . 1 1/4 cups all-purpose flour
- . 2 tablespoons cold vegetable shortening
- . 1/4 teaspoon salt
- . 2 to 4 tablespoons ice water
- For Filling
- . 4 large firm-ripe Bosc pears (2 pounds total)
- . 1/2 stick (1/4 cup) unsalted butter
- . 1/2 cup sugar
- . 1/2 teaspoon cinnamon
Instructions
- For Pastry: Cut butter into 1/2-inch cubes.
- In a bowl with your fingertips or a pastry blender blend together flour, butter, shortening, and salt until most of mixture resembles coarse meal with remainder in small (roughly pea-size) lumps.
- Drizzle 2 tablespoons ice water evenly over mixture and gently stir with a fork until incorporated. Test mixture by gently squeezing a small handful: When it has proper texture it should hold together without crumbling apart.
- If necessary, add more water, 1 tablespoon at a time, stirring until incorporated, and test mixture again. (Do not overwork or add too much water; pastry will be tough.)
- Turn mixture out onto a work surface and divide into 4 portions. With heel of hand smear each portion once in a forward motion to help distribute fat. Gather dough together and form it, rotating it on work surface, into a disk. Chill dough, wrapped in plastic wrap, until firm, at least 1 hour, and up to 1 day.
- For filling: Peel, core and slice the pears.
- Heat butter in a 9- to 10-inch well-seasoned cast-iron skillet over moderate heat until foam subsides, then stir in sugar (sugar will not be dissolved).
- Arrange pears, cut sides up, in skillet with wide parts at rim of skillet. Sprinkle pears with cinnamon and cook, undisturbed, until sugar turns a deep golden caramel.(This can take as little as 10 minutes or as much as 25, depending on pears, skillets, and stove.) So watch the fragrance and the color of the caramel closely. Cool pears completely in skillet.
- Put oven rack in middle position and preheat oven to 425°F.
- Roll out dough on a lightly floured surface with a floured rolling pin into a 12-inch round and trim to a 9 1/2- to 10 1/2-inch round. Arrange pastry over caramelized pears, tucking edge around pears inside rim of skillet. Bake tart until pastry is golden brown, 30 to 35 minutes. Cool on rack 5 minutes.
- Invert a rimmed serving plate (slightly larger than skillet) over skillet and, using pot holders to hold skillet and plate tightly together, carefully invert tart onto plate. Serve tart warm or at room temperature.
Recommended Products
As an Amazon Associate and member of other affiliate programs, I earn from qualifying purchases.
Nutrition Information:
Yield:
8Serving Size:
1Amount Per Serving: Calories: 345Total Fat: 14gSaturated Fat: 6gTrans Fat: 0gUnsaturated Fat: 7gCholesterol: 12mgSodium: 226mgCarbohydrates: 51gFiber: 2gSugar: 17gProtein: 4g

Christine
Friday 2nd of February 2024
Worst recipe in ever in the sense of vagueness. Oh, it may take this long or that long. No explanation of what to watch for with the carmel… it’s so sticky I must not have cooked it long enough in the initial cooking process.
Susan Williams
Friday 9th of February 2024
Thank you for your kind words, Christine. I'm sorry your caramel didn't turn out. The caramelization reactions require intense heat (340˚F/170˚C), and too much heat for too long will produce very dark, sticky and bitter tasting caramel, rather than a light brown, sweet and complex tasting syrupy solid.
Cindy Anthony
Monday 21st of November 2022
Can I use a store bought pie crust?
Susan Williams
Wednesday 23rd of November 2022
I mean...sure...you can. But that is nothing like the crust in this recipe. But you could.
BeckyJ
Wednesday 17th of August 2011
Ooh, I've been looking for something to make with some pears I have. This looks delicious! If I make it, I'll post it on my blog with a link to here. Yum!
Sweet Al
Saturday 13th of November 2010
O-o-o, I was looking for something different for T'giving. Thanks. I think I'll make some cinnamon ice cream to go with it.
Susan in the Boonies
Tuesday 9th of November 2010
This would be fabuloso, Chère Valuchka, with any poire you love!That pear confection was turned upside down into a beautiful tart pan that Donna gave me for a wedding present, that had a little Swiss wedding scene on it! I had forgotten that it would mean something to you till this moment. Sweet, ain't it?